|
8/5/2021 0 Comments ROSSI Dip Powder Review
At home pampering has soared in the last year due to all of the lockdowns. My province had entered a third lockdown earlier in the spring which made getting your nails done impossible. We are now almost fully open again, with salons opening their doors, but many have found ways to do their nails from home with salon quality. One of those at home mani solutions is dip nails, which I am so excited to give a try.
ROSSI Nails had a great special right around Christmas and I've been intrigued with trying dip powders as well as polygel extensions. I don't want to invest in a UV lamp juuuuuuust yet so the dip powders definitely caught my eye. I love the idea of a long lasting colour that is more like a shellac/gel polish. I will paint my nails, sneeze and chip a nail LOL. I may be exaggerating, but only a little bit... Despite waiting, however long I am supposed to wait, no matter if I do or don't use a top coat, even using quick dry drops, I will go to bed and wake up with an impression or smudge of some sort. Who wants to spend all that time painting your nails for them to not even make it out of the house?! Certainly not I. So the idea of up to 3 weeks of colour has me thrilled.
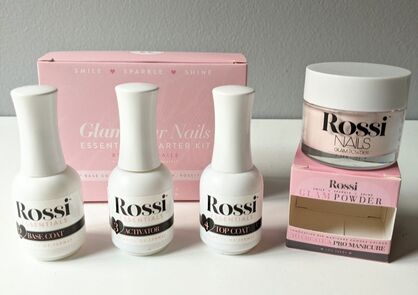
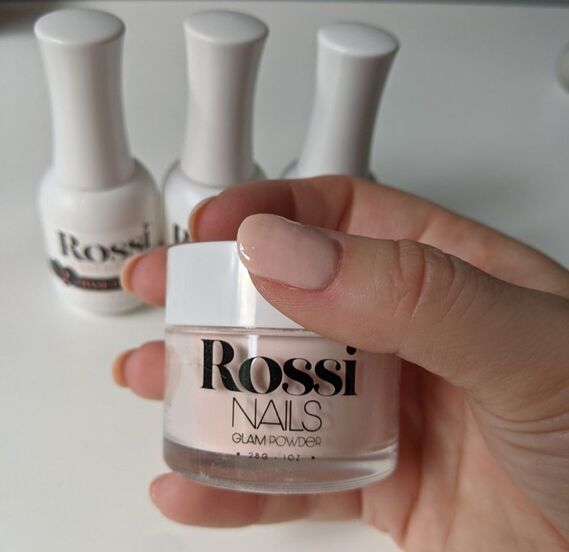
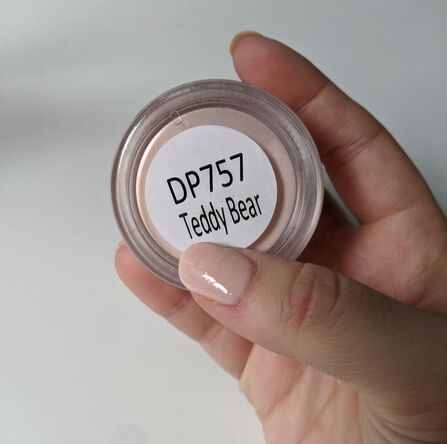
For those who may be newer here and not follow my instagram, I did have gel nails for several months in 2019. I loved it, but my nails took even longer to recover once I removed them because they had been filed down a bit too much. But I loved the lasting colour, so I'm hoping to achieve a similar vibe from this dip powder. I also enjoyed how durable my nails were, they felt so much stronger with gels, which meant they weren't cracking or peeling. The colour I ended up purchasing was Teddy Bear because I thought it was such a pretty soft pink shade and would be a simple colour to whack on for a few weeks, regardless of season. I do own a ridiculous amount of polish and I'm a little fearful that if I fall in love with dips and potentially gels (if/when I purchase a lamp), my already overflowing collection will burst at the seams. But that's a future-Sydnee problem! Process So let's get started with the prep work. You are supposed to clean up your nail beds, push back and trim your cuticles. Easy peasy. Now you will need the essentials kit (which can be purchased individually) which contains the base coat, activator and top coat. You will also need a brush (they suggest kabuki) to brush away the excess powder between dips. Step 1: Apply the base coat and dip nail in powder at a 45 degree. Repeat until you get your desired colour depth. I dipped each nail 2 times. I found that the brush didn't make any impressions on the nail but unfortunately the brush I chose did shed a bit, so I was plucking out hairs from the dip powder jar. Step 2: Apply the activator, let it dry one minute. Buff the nail with a file, and apply another coat of activator. This was relatively straight forward and posed no issues. Step 3: After letting the activator dry for a minute, apply the top coat thinly and quickly to the nail and repeat again after two minutes of drying. They recommend two layers of top coats. TADA. Nails are DONE!
My Initial Feelings:
The process overall seemed very simple and not overly daunting. In actuality, it takes some finesse to get it right. I found on a few of the first nails that I did, the application was thick on one edge and led to a bump feeling. Also I will note that the powder is so finely milled that you displace a lot of powder with each dipped finger. I was constantly trying to keep it in the pot and find some alternative ways of getting the powder on my nails using my other hand to push the powder up. It does take a bit longer than I thought it would. You definitely cannot rush the application process as you could with regular polish, so definitely keep that in mind. I know for many, the process of doing their nails is their "me-time" so if you keep that in mind, then this is fine. The application of polish was much smoother and easier on my second hand (dominant). The powder stuck well and didn't clump or cause issue. I have to admit the bumps on three of my nails drove me CRAZY so I decided to take it off and redo them. Let me tell you...that was NOT FUN. To be fair, I was losing my patience. You have to use acetone and they recommend soaking some cotton buds and using some aluminum foil to keep it in place. You have them sit for 10-15 minutes and the colour is supposed to just slip off. If it doesn't you can soak again for another 5 minutes. I think that I soaked for 10 and then 5 more and still struggled to get some of the colour off. The reapplication was smoother the second time, so I am glad that I reapplied. I will say that my nails felt noticeably sturdier with this colour on, just like when I had my gel nails. I am thrilled with that, because I don't worry as much about jamming my nails, which I do quite often haha. My currently nail length is not very long (to my standard) so I am excited to see how they feel when I have my longer length. Now to see just how well it lasts and how long! As I said, it is supposed to last up to three weeks so keep reading to see the update as time progressed. I am definitely considering buying some more colours if the removal doesn't make me rip my hair out.
Results & Removal
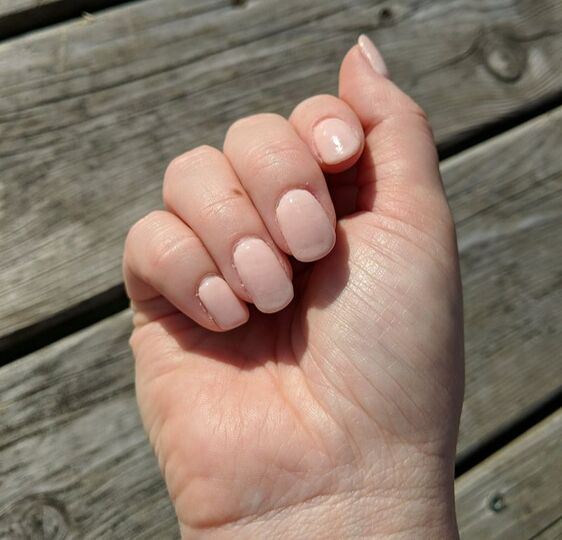
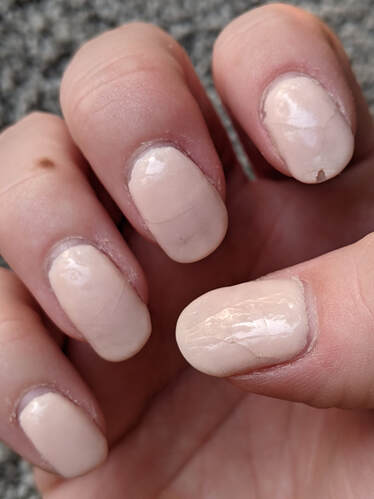
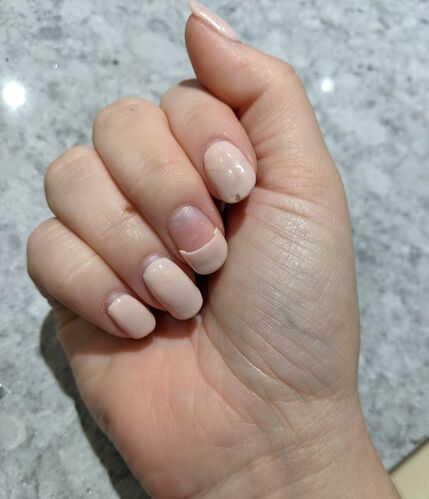
First off, my manicure lasted exactly one week. But I think that comes down to it being my first application ever. I did notice after a few days that there seemed to be very faint cracks appearing across some of my nails. The funniest bit is I woke up Friday morning with half of my middle finger nail missing LOL. I did also notice a chip on a couple of nails before that, but they were not very large so I ignored them. I will admit that once the nail chunk went missing I did start picking at the dip. I actually managed to remove about half of each nail in some decent sized chunks. I was a little more careful around my free edge because I was not about to rip my own nails off! I was also at the cottage and didn't have acetone with me, had I been home I would have just taken it off.
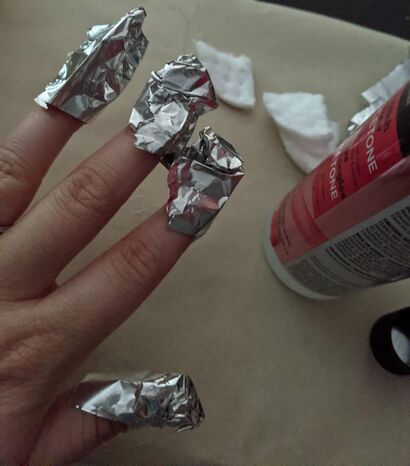
Once I was back home, I soaked some cotton rounds and wrapped my fingers up in tinfoil for about 15 minutes. Most of the remaining chunks slid off rather easily, but there were a few gummy spots that were resisting. I did have to do one hand at a time when removing because I was multi-tasking and it was just easier that way, but of course that means it took twice as long.
I think that the removal process may have taken longer if I hadn't already picked off half of the nail, but I cannot confirm that. Overall the process wasn't too bad. To be fair, I rushed into the removal and forgot that you were supposed to rough up the nail with a file before soaking them in acetone. They do also recommend that you do NOT use an acetone with a moisturizer in it, just straight up 100% acetone, or it won't work nearly as well (or at all in come cases).
Final Thoughts
I do think that this is a great at home method if you are someone who has enjoyed shellac/gel nails and maybe want to cut down on your visits to the salon. If you are someone who wears a manicure to death before taking it off, I think this is also a great option. If you are really good at rotating your polish and have a weekly ritual for it, this could still be an option but the time to remove may become tedious if done weekly. But that is just me. I do think that I will be picking up another colour or two as they currently have a sale on. I would definitely look to getting some colours I don't already own and that I know I would like to stare at for some time. They have SO many cool colours and finishes... I am definitely willing to give it another go and see if the dip can outlast a week. I'm still happy that it lasted a week and gave my nails that strength. So given the jars are about $15 a pop, it compares to some of the other higher end polishes out there. ROSSI have also been advertising a new easy peel base that is suppose to just allow you to soak off your nails in warm water with NO acetone! So with 50% off, I think it's worth it but it does cut down on the length of your manicure. They give you some instructions on how to apply it with prolonging your manicure in mind. So I would be interested to see how that worked out. If I pick it up, let me know if you'd like a specific review on that! So now I have to ask, have you tried a dip powder nail before? Either at home or in the salon? I would love to hear your experiences!
0 Comments
Leave a Reply. |
|
Social Media |
Contact |
© COPYRIGHT 2015. ALL RIGHTS RESERVED.
|


 RSS Feed
